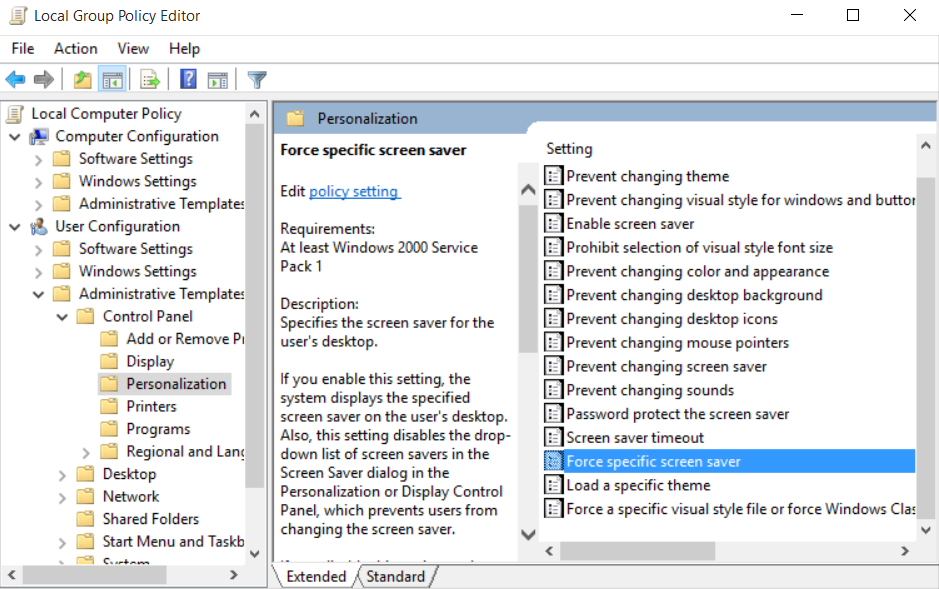
Have you ever loved a screen saver too much that you don’t want to change it forever or prevent other from changing it? If yes, then a setting is especially for you because you can select your favorite screen saver and then just lock it so that no one could ever change.
This setting of the Personalization section basically disables the drop-down list for all the screen savers which are present onto your system. Let's see on how to perform this action.
How to force a specific screen saver Windows 10
Step-1:- At first go to the search of your windows and type “gpedit” in the search box. This will show you the Group Policy Editor at the top. Click on its icon to open it.
Step 2:- Now follow the below-written path to reach the “Force Specific Screen Saver” setting.
- Local Computer Policy => User Configuration => Administrative Templates => Control Panel => Personalization
 |
| How to Force a Specific Screen Saver on Windows 10 |
Step 3:- Double click on this icon to open the edit window. You can also open its edit window by right clicking on its icon and then selecting the “edit” in the context menu. This will open the Edit Window of “Force Specific Screen Saver”.
Step 4:- By default, the state of this setting is set to “Not Configured”. This means that user can select any screen saver. This stands true even when you opt to disable this setting. To enable this setting, you need to click on the bubble present on the left of Enabled option. This setting could be completed by typing the name of the file which contains the screen saver along with its extension i.e. .scr file.
Step 5:- Enabling this setting will display the specific screen saver on the desktop of user. It should also be kept in mind that it disables the basic feature of dropping down the list of different screensavers present in one's PC. In simple words, it doesn't let you change your Screen Saver anymore.
Step 6:- Now click on Apply and then press OK and you are done.
Step 6:- Now click on Apply and then press OK and you are done.

No comments:
Post a Comment